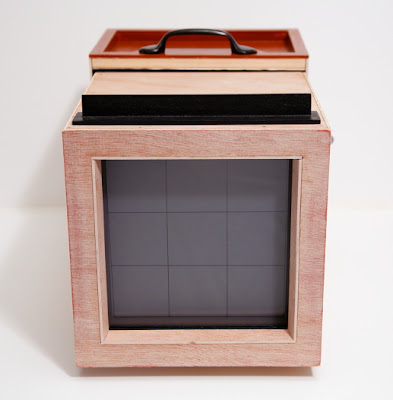
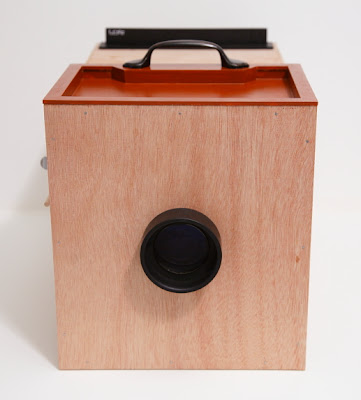
DONE! Isn't she pretty, well boxy if nothing else.
 |
| 6x6 inch negative, nice an big! |
although I don't imagine I'll be using the f/32-f/64 range all that much. The sensitivity of the dry waxed negatives isn't that great. In full BDE sun the exposure will be something like 4-5minutes at f/16, and that gets dramatically longer the more stopped down it gets. But that's the backbone of the whole project, to slow down.
 The construction took a bit longer that expected, about two weeks longer(a good portion of that was building the box and adding some final touches to the camera to make it look more pleasing, hey this is a visual art-form after all, ones tools must be nice to look at!)
I have to admit I'm ready to move on to the next stage, photographing with it. I have a feeling this is where the troubleshooting, tweaking, fidgeting and fun will really begin. Since the final prints will be contact printed by the sun and not enlarged I don't need to setup a dedicated darkroom (couldn't even if I wanted to, ha!). I do however need a darkened room with a decent table to lay out several chemical trays for the intricate steps from sensitizing the negatives to developing the final prints. Our bathroom is small, but it'll do just fine, I even worked it out so the toilet can still be used during the 12-14 hour procedures (aren't a nice husband, wink!).
 |
| shopping list #1 |
 |
| The film holder with dark-slide removed. I had to sand away the black paint on the edges to make it fit. |
The film holder was the hardest part to construct. I had to alter the design from the book to make it work for my camera, and in doing so I added a few alterations I think make it a better design. I added a film slot to load the film and mirrored the back so I have two exposures per holder. I only built one for the moment because I wanted to test it out before I 'mass' produced more of them.

This tube piece was photographed for the previous post, but I wanted to show it up close. It attaches to the lens and the slot on the top is for the aperture cards to slide into. See the previous camera project post to see it on the camera. The round piece in front is the 'lens cap' and fits snuggly in the front hole. I'll take it off and on to start and stop the exposure. With exposure times of upwards of 5-20 minutes the camera doesn't need a mechanical shutter. And lastly, a picture of the ground glass holder. This slides into the film holder slot at the rear of the camera. The image needs a frosted surface to focus onto. After composing and focusing I remove this ground glass holder and replace it with the film holder and the image is ready to be exposed.
I've been using a few books as guidelines and must give credit to both of them. Alan Greene's Primitive Photography and Christopher James's The Book of Alternative Photographic Processes. Both have been an inspiration and a foundation for the initial steps of this project. I'll continue to reference them as I move away from the workshop and into the darkroom.
The next post will be about the darkroom setup and the initial stages of negative construction. This camera as been an amazing build. It's made me appreciate photography in a new way and I'm giddy to start shooting with it.
Stay Tuned!
 |
| all wrapped up! |


